Installation
Get Cloudsuo up and running on your server within minutes with this easy-to-follow installation guide.
Follow these steps in order to set up Cloudsuo locally and deploy it to your server, effectively managing Docker containers and applications:
You need to follow this steps in the same order:
Virtual Private Server (VPS)
There are multiple VPS providers to choose from:
The upstream project lists the following Linux distributions:
- Ubuntu 24.04 LTS
- Ubuntu 23.10
- Ubuntu 22.04 LTS
- Ubuntu 20.04 LTS
- Ubuntu 18.04 LTS
- Debian 12
- Debian 11
- Debian 10
- Fedora 40
- Centos 9
- Centos 8
Providers
- Hostinger Get 20% Discount using this referral link: Referral Link
- AmericanCloud Receive 20$ credits for free: Referral Link
- Teramont Get 15% discount for free: Referral Link
- Hetzner Get 20€ credits for free with this referral link: Referral Link
- DigitalOcean Get 200$ credits for free with this referral link: Referral Link
- Vultr Referral Link: Referral Link
- Linode
- Scaleway
- Google Cloud
- AWS
Requirements
To ensure a smooth experience with Cloudsuo, your server should have at least 2GB of RAM and 30GB of disk space. This specification helps to handle the resources consumed by Docker during builds and prevents system freezes.
Suggestion: For cost efficiency with reliable service, we recommend Hetzner as the best value-for-money VPS provider.
Port Requirements
Before installing Cloudsuo, ensure the following ports are available on your server:
- Port 80: HTTP traffic (used by Traefik)
- Port 443: HTTPS traffic (used by Traefik)
- Port 3000: Cloudsuo web interface
Important: The installation will fail if any of these ports are already in use. Make sure to stop any services using these ports before running the installation script.
Docker
Cloudsuo utilizes Docker, so it is essential to have Docker installed on your server. If Docker is not already installed, Cloudsuo's installation script will install it automatically. Use the following command to install Cloudsuo:
Run the single command below as root. It detects Linux and installs missing download tools, certificates, system dependencies and Docker automatically. This command installs the current canary test release.DOKPLOY_VERSION=canary sh -c 'set -e; [ "$(id -u)" = 0 ] || { echo "Run as root" >&2; exit 1; }; [ "$(uname -s)" = Linux ] || { echo "Linux is required" >&2; exit 1; }; case "$(uname -m)" in x86_64|aarch64|arm64) ;; *) echo "amd64 or arm64 is required" >&2; exit 1;; esac; if { ! command -v curl >/dev/null && ! command -v wget >/dev/null; } || { [ ! -s /etc/ssl/certs/ca-certificates.crt ] && [ ! -s /etc/ssl/cert.pem ]; }; then if command -v apt-get >/dev/null; then apt-get update && DEBIAN_FRONTEND=noninteractive apt-get install -y curl ca-certificates; elif command -v dnf >/dev/null; then dnf install -y curl ca-certificates; elif command -v yum >/dev/null; then yum install -y curl ca-certificates; elif command -v apk >/dev/null; then apk add --no-cache curl ca-certificates; elif command -v pacman >/dev/null; then pacman -S --noconfirm --needed curl ca-certificates; elif command -v zypper >/dev/null; then zypper --non-interactive install curl ca-certificates; else echo "Unsupported package manager" >&2; exit 1; fi; fi; umask 077; f=$(mktemp); trap '\''rm -f "$f"'\'' EXIT; if command -v curl >/dev/null; then curl -fLsS --retry 3 https://cloudsuo.com/install.sh -o "$f"; else wget -qO "$f" https://cloudsuo.com/install.sh; fi; sh "$f" "$@"' installSee Manual Installation if you want to customize your Cloudsuo installation.
Advanced Installation Options
Canary installation is available for testing; stable release validation continues.The current installer accepts only the verified canary release. Stable and version-specific commands below remain unavailable until those releases are published. Network environment variables retain their upstream behavior.
Install Specific Versions
Install Canary Version (Development):
export DOKPLOY_VERSION=canary && curl -sSL https://cloudsuo.com/install.sh | shInstall Latest Stable:
export DOKPLOY_VERSION=latest && curl -sSL https://cloudsuo.com/install.sh | shInstall a Specific Version:
Every Cloudsuo release includes its own install.sh as a release asset, which installs exactly that version with the setup it expects. Replace the version tag in the URL with the one you want:
curl -sL https://cloudsuo.com/releases/v0.1.0/install.sh | shDon't use DOKPLOY_VERSION to install a specific version — the main script at cloudsuo.com/install.sh always targets the latest release, so its setup may not be compatible with older versions.
Custom Network Configuration
If you need to customize the Docker Swarm network configuration (useful to avoid CIDR conflicts with cloud provider VPCs):
export DOCKER_SWARM_INIT_ARGS="--default-addr-pool 172.20.0.0/16 --default-addr-pool-mask-length 24"
curl -sSL https://cloudsuo.com/install.sh | sh
Manual Advertise Address
If the script cannot detect your server's IP automatically, or you want the Swarm to use a specific interface (e.g. a VPN/WireGuard IP), specify it manually:
curl -sSL https://cloudsuo.com/install.sh | sudo ADVERTISE_ADDR=192.168.1.100 shIf you run the installer with sudo, don't rely on export ADVERTISE_ADDR=... from your user shell — sudo resets the environment, so the variable never reaches the script and it falls back to auto-detection. Pass the variable inline as shown above, or use sudo -E sh to preserve your environment. The same applies to DOKPLOY_VERSION, DOCKER_SWARM_INIT_ARGS, and ENDPOINT_MODE.
Kernels Without IPVS Support
Docker Swarm's default service discovery requires IPVS support in the kernel. Some minimal or appliance-style distributions (e.g. ZimaOS and other Buildroot-based images) ship kernels without it. On those systems, install with DNSRR endpoint mode:
curl -sSL https://cloudsuo.com/install.sh | sudo ENDPOINT_MODE=dnsrr shSee Services Can't Reach Each Other (Missing IPVS Kernel Modules) for how to detect this situation and its trade-offs.
Proxmox LXC Support
The installation script automatically detects Proxmox LXC containers and applies the necessary configurations (--endpoint-mode dnsrr) for compatibility.
Updating Cloudsuo
To update your Cloudsuo installation to the latest version:
DOKPLOY_VERSION=canary sh -c 'set -e; [ "$(id -u)" = 0 ] || { echo "Run as root" >&2; exit 1; }; [ "$(uname -s)" = Linux ] || { echo "Linux is required" >&2; exit 1; }; case "$(uname -m)" in x86_64|aarch64|arm64) ;; *) echo "amd64 or arm64 is required" >&2; exit 1;; esac; if { ! command -v curl >/dev/null && ! command -v wget >/dev/null; } || { [ ! -s /etc/ssl/certs/ca-certificates.crt ] && [ ! -s /etc/ssl/cert.pem ]; }; then if command -v apt-get >/dev/null; then apt-get update && DEBIAN_FRONTEND=noninteractive apt-get install -y curl ca-certificates; elif command -v dnf >/dev/null; then dnf install -y curl ca-certificates; elif command -v yum >/dev/null; then yum install -y curl ca-certificates; elif command -v apk >/dev/null; then apk add --no-cache curl ca-certificates; elif command -v pacman >/dev/null; then pacman -S --noconfirm --needed curl ca-certificates; elif command -v zypper >/dev/null; then zypper --non-interactive install curl ca-certificates; else echo "Unsupported package manager" >&2; exit 1; fi; fi; umask 077; f=$(mktemp); trap '\''rm -f "$f"'\'' EXIT; if command -v curl >/dev/null; then curl -fLsS --retry 3 https://cloudsuo.com/install.sh -o "$f"; else wget -qO "$f" https://cloudsuo.com/install.sh; fi; sh "$f" "$@"' install updateUpdate to Specific Version:
Use the install.sh from that version's GitHub release:
curl -sL https://cloudsuo.com/releases/v0.1.0/install.sh | sh -s updateCompleting the Setup
After running the installation script, Cloudsuo and its dependencies will be set up on your server. Here's how to finalize the setup and start using Cloudsuo:
Accessing Cloudsuo
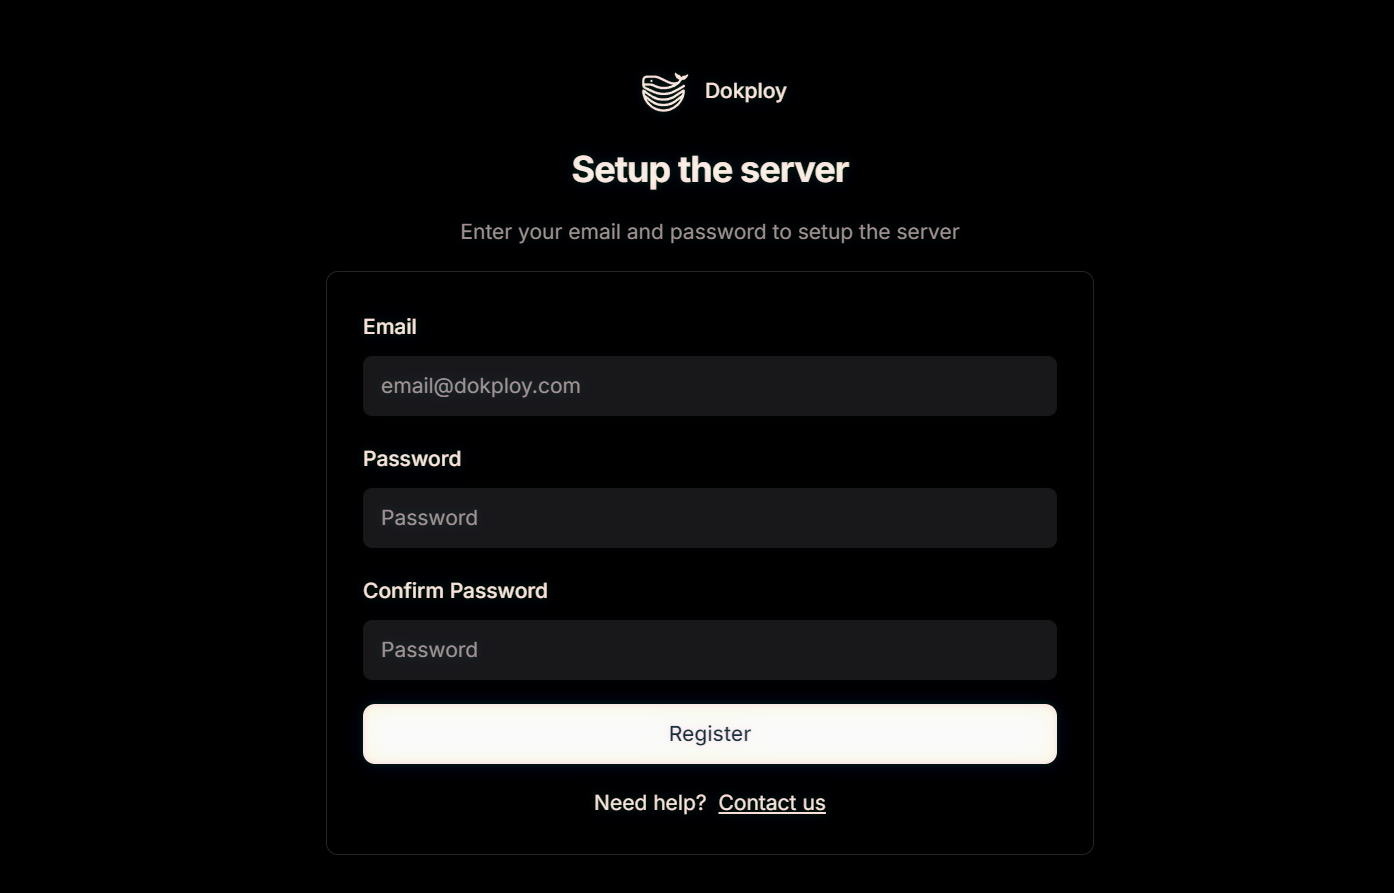
Open your web browser and navigate to http://your-ip-from-your-vps:3000. You will be directed to the initial setup page where you can configure the administrative account for Cloudsuo.
Important: Ensure that your server's firewall allows traffic on port 3000 to access the Cloudsuo web interface.
Initial Configuration
- Create an Admin Account: Fill in the necessary details to set up your administrator account. This account will be the admin account for Cloudsuo.
Secure Your Installation
After setting up your admin account, it's crucial to secure your Cloudsuo installation by enabling HTTPS.
To configure a domain with SSL/TLS certificates for your Cloudsuo panel, please refer to the Domains section where you'll find detailed instructions for different SSL configurations including Let's Encrypt, Cloudflare, and custom certificates.
Disable access via ip:port (Optional but Recommended)
To enhance security, it's advisable to restrict access to Cloudsuo via the server's IP address and port.
Important: Before disabling IP:port access, make sure you have configured a domain with HTTPS working properly. Otherwise, you will lose access to your Cloudsuo installation. See the Domains section to set this up first.
Once you have verified that your domain is working correctly, you can disable IP:port access by running this command on the server:
docker service update --publish-rm "published=3000,target=3000,mode=host" dokployTo further secure your installation, consider reading the Security recommendations section.